

The magic of Better Than Anything Bars starts with their perfect balance of textures and flavors that create something truly special in every bite. These four-layer dessert bars originated from the creative minds of home bakers who wanted maximum impact with minimal fuss, and they’ve been winning hearts at church socials, office parties, and family gatherings ever since.
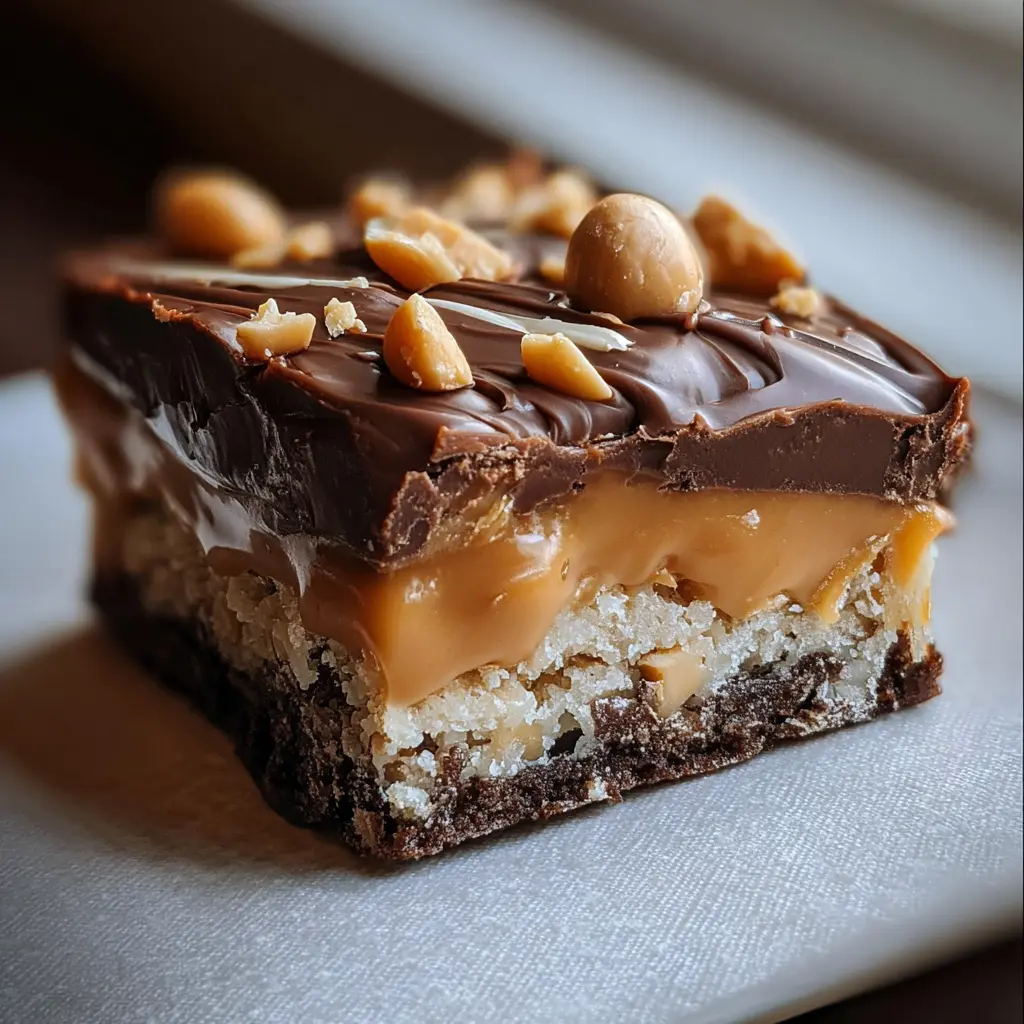
What makes these bars genuinely better than most desserts is their foolproof nature – even novice bakers can achieve bakery-quality results. The moist cake layer provides the perfect foundation, while the caramel adds richness without overwhelming sweetness. The whipped topping brings lightness to balance the denser elements, and the toffee bits deliver that satisfying crunch that keeps you reaching for another piece.
These bars also shine because they actually improve after a day in the refrigerator, as the flavors meld together and the textures settle into perfect harmony. This makes them ideal for entertaining since you can prepare them ahead of time, leaving you free to focus on your guests rather than last-minute dessert prep.
Ingredients List
For the Cake Base:
- 1 box (15.25 oz) yellow cake mix
- 1/2 cup unsalted butter, melted
- 1/3 cup water
- 2 large eggs
For the Caramel Layer:
- 1 can (14 oz) sweetened condensed milk
- 1 jar (12 oz) caramel ice cream topping
- 2 tablespoons butter
For the Topping Layers:
- 1 container (8 oz) frozen whipped topping, thawed
- 1 cup toffee bits (such as Heath or Skor)
- 1/2 cup chopped pecans (optional)
Practical Substitutions:
- Gluten-free option: Replace regular cake mix with your favorite gluten-free yellow cake mix
- Dairy-free alternative: Use dairy-free whipped topping and ensure your caramel topping is dairy-free
- Homemade cake base: Substitute 2 cups flour, 1 1/3 cups sugar, 1/3 cup butter, 1 1/2 tsp baking powder, 1/2 tsp salt, 2/3 cup milk, and 1 egg if you prefer making from scratch
- Caramel substitute: Dulce de leche works beautifully in place of caramel topping
- Toffee alternatives: Crushed butterscotch chips, mini chocolate chips, or chopped chocolate-covered coffee beans
Timing
Total Time: 3 hours 45 minutes
- Prep Time: 15 minutes
- Baking Time: 30 minutes
- Cooling and Assembly Time: 45 minutes
- Chilling Time: 2 hours minimum (overnight preferred)
Time Management Tips:
The beauty of Better Than Anything Bars lies in their make-ahead friendly nature. Start these the day before your event for best results, as the overnight chilling time allows all layers to set properly and flavors to meld beautifully.
While the cake bakes, prepare your caramel mixture and let your whipped topping come to room temperature. This efficient use of time means you’ll have everything ready for quick assembly once the cake cools.
Make-Ahead Strategy:
These bars can be completely assembled up to three days in advance, making them perfect for stress-free entertaining. The longer chilling time actually improves their texture and makes cutting cleaner, neater squares much easier.
How to Make It
1. Prepare the Cake Foundation
Preheat your oven to 350°F and grease a 9×13-inch baking pan thoroughly. In a large mixing bowl, combine the cake mix, melted butter, water, and eggs. Mix until just combined – don’t overwork the batter as this can make the cake tough. The mixture will be thicker than regular cake batter, which is exactly what you want for a sturdy base layer.
Press the batter evenly into your prepared pan using clean hands or an offset spatula. The layer should be uniform to ensure even baking and a level foundation for your toppings.
2. Bake the Base Layer
Bake for 25-30 minutes until the cake is golden brown and springs back lightly when touched in the center. Don’t overbake, as the cake will continue cooking slightly from residual heat. While the cake bakes, you’ll notice a wonderful buttery aroma filling your kitchen – this is your first sign that something amazing is in the works.
Remove from the oven and immediately use a wooden skewer or fork to poke holes evenly across the entire surface, spacing them about an inch apart. These holes are crucial as they allow the caramel to seep into the cake, creating that signature moist, flavorful base.
3. Create the Caramel Magic
While the cake is still warm, combine the sweetened condensed milk, caramel topping, and butter in a microwave-safe bowl. Microwave in 30-second intervals, stirring between each, until the mixture is smooth and pourable. This usually takes 1-2 minutes total.
Pour the warm caramel mixture over the cake immediately, using a spoon to gently spread it and ensure it fills all the holes. The caramel will seem like a lot, but trust the process – it will absorb into the cake beautifully as it cools.
4. Add the Finishing Touches
Allow the cake to cool completely to room temperature, about 45 minutes. This step requires patience, but it’s essential for the structural integrity of your bars. Once cooled, spread the whipped topping evenly over the caramel layer using a gentle hand to avoid mixing the layers.
Finally, sprinkle the toffee bits evenly over the whipped topping, pressing them lightly to help them adhere. Add chopped pecans if using, which provide a lovely contrast to the sweet layers.
5. The Final Rest
Cover the pan tightly with plastic wrap and refrigerate for at least 2 hours, though overnight is even better. This chilling time allows all the flavors to meld and makes cutting clean, professional-looking squares much easier.
Nutritional Information
Per serving (1 square, assuming 15 servings):
- Calories: Approximately 380
- Fat: 16g
- Carbohydrates: 58g
- Protein: 6g
- Sodium: 320mg
- Sugar: 45g
These Better Than Anything Bars provide energy from carbohydrates and some protein from the eggs and milk products. The nuts, if included, add healthy fats and additional protein. While these are definitely an indulgent treat, they contain calcium from the dairy ingredients and provide satisfying energy for special occasions.
Keep in mind that nutritional values may vary depending on specific brands used and any substitutions made. The portion size can also be adjusted – cutting smaller squares naturally reduces the nutritional impact per serving.
Healthier Alternatives for the Recipe
Reducing Sugar and Calories:
Use sugar-free cake mix and sugar-free caramel topping to significantly reduce the sugar content. Light whipped topping can replace regular versions, cutting calories by about 25% without sacrificing much texture or taste.
Gluten-Free Adaptation:
Simply substitute the regular cake mix with a high-quality gluten-free yellow cake mix. Most major brands now offer excellent gluten-free options that work perfectly in this recipe without requiring any other modifications.
Portion Control Strategy:
Cut the bars into smaller 1-inch squares for portion-controlled treats. This allows everyone to enjoy the indulgence while naturally limiting serving sizes. These smaller portions are perfect for parties where guests want to try multiple desserts.
Adding Nutritional Value:
Incorporate chopped walnuts or pecans for healthy omega-3 fatty acids and additional protein. You can also add a thin layer of fresh sliced strawberries under the whipped topping for extra vitamins and a pop of fresh flavor that cuts through the richness.
Serving Suggestions
Presentation Ideas:
Cut Better Than Anything Bars into clean squares using a sharp knife wiped clean between cuts. Arrange them on a white platter to showcase the beautiful layers, or serve them directly from the pan for casual gatherings.
Perfect Pairings:
These rich bars pair wonderfully with strong coffee or espresso, which balances their sweetness beautifully. For evening entertaining, try them alongside dessert wines or even a glass of cold milk for a nostalgic touch.
Seasonal Variations:
During fall, sprinkle the top with a light dusting of cinnamon or add chopped apple pieces to the caramel layer. For holidays, consider using colored toffee bits or adding a festive sprinkle of chopped peppermint bark on top.
Special Occasion Adaptations:
For birthdays, add colorful sprinkles to the whipped topping layer. For more elegant affairs, drizzle additional caramel sauce in decorative patterns over individual servings and garnish with a single toasted pecan half.
Common Mistakes to Avoid
Skipping the Cooling Step:
The biggest mistake is rushing the cooling process before adding the whipped topping. If the cake is even slightly warm, it will melt the whipped layer and create a messy, unappealing appearance. Always ensure complete cooling before proceeding.
Overmixing the Cake Batter:
Treat this more like a cookie dough than cake batter. Overmixing develops too much gluten, resulting in a tough, chewy base instead of the tender foundation these bars need.
Inadequate Hole-Poking:
Don’t be shy about making holes in the warm cake. Insufficient holes mean the caramel won’t penetrate properly, leaving you with distinct layers rather than the integrated flavors that make these bars special.
Using Cold Whipped Topping:
Whipped topping straight from the refrigerator is stiff and difficult to spread smoothly. Let it come to room temperature for easier spreading and better integration with the other layers.
Storing Tips for the Recipe
Refrigerator Storage:
Store Better Than Anything Bars covered tightly in the refrigerator for up to 5 days. The bars actually improve with time as flavors meld, making day-two bars even better than fresh ones. Use plastic wrap directly on the surface to prevent the whipped topping from drying out.
Freezing Guidelines:
These bars freeze beautifully for up to 3 months. Wrap individual portions in plastic wrap, then place in freezer bags for easy single-serving access. Thaw in the refrigerator overnight before serving for best texture.
Make-Ahead Tips:
Prepare the entire recipe up to 3 days in advance, keeping them refrigerated until serving time. This actually improves the texture and makes cutting cleaner squares much easier. For longer storage, freeze without the whipped topping and toffee bits, then add these layers after thawing.
Transport Advice:
For potluck dinners or parties, keep these bars in an insulated cooler with ice packs. The whipped topping layer requires consistent cool temperatures to maintain its structure and food safety.
Conclusion
Better Than Anything Bars truly live up to their name by delivering restaurant-quality dessert results with home kitchen simplicity. These four-layer beauties prove that the best recipes often come from combining familiar ingredients in new, exciting ways. The magic happens in the details – the holes that let caramel seep into every bite, the overnight chilling that melds flavors perfectly, and the contrast of textures that keeps every forkful interesting.
Whether you’re planning for a special celebration or simply want to treat your family to something extraordinary, these bars offer the perfect solution. They’re forgiving enough for beginning bakers yet impressive enough to wow experienced dessert lovers. The make-ahead convenience means you can create bakery-worthy results without day-of stress.
Try this recipe and discover why countless home bakers have made Better Than Anything Bars their go-to crowd-pleaser. I’d love to hear about your experience making them and any creative variations you discover along the way!
FAQs
Can I make Better Than Anything Bars without toffee bits?
Absolutely! While toffee bits add wonderful texture and flavor, you can substitute them with mini chocolate chips, crushed cookies, chopped nuts, or even coconut flakes. The bars will still be delicious with any crunchy element you prefer.
Why are my bars soggy instead of set?
This usually happens when the cake wasn’t cooled completely before adding the whipped topping, or if the bars haven’t chilled long enough. Make sure the cake reaches room temperature and allow at least 2 hours of refrigeration time, preferably overnight.
Can I use homemade whipped cream instead of whipped topping?
Yes, but stabilized whipped cream works best for longer storage. Add a packet of unflavored gelatin or a tablespoon of cornstarch to help maintain structure. Regular whipped cream may deflate after a day or two.
How do I get clean cuts when serving?
Use a sharp knife and wipe it clean with a damp cloth between each cut. Chilling the bars thoroughly beforehand makes cutting much easier. For the cleanest cuts, briefly dip the knife in warm water before each slice.
Can these bars be made dairy-free?
Yes! Use dairy-free cake mix (check ingredients), coconut condensed milk, dairy-free caramel sauce, and dairy-free whipped topping. The texture and flavor remain excellent with these substitutions.
What’s the best way to transport these bars?
Keep them chilled in an insulated container with ice packs. Cut them just before serving if possible, or transport the whole pan and cut on-site. The whipped topping layer needs consistent cool temperatures to maintain its appearance and food safety.
Better Than Anything Bars Recipe
- Total Time: 3 hours 45 minutes
- Yield: 15 bars 1x
Description
Ingredients
For the Cake Base:
- 1 box (15.25 oz) yellow cake mix
- 1/2 cup unsalted butter, melted
- 1/3 cup water
- 2 large eggs
For the Caramel Layer:
- 1 can (14 oz) sweetened condensed milk
- 1 jar (12 oz) caramel ice cream topping
- 2 tablespoons butter
For the Topping Layers:
- 1 container (8 oz) frozen whipped topping, thawed
- 1 cup toffee bits (such as Heath or Skor)
- 1/2 cup chopped pecans (optional)
Practical Substitutions:
- Gluten-free option: Replace regular cake mix with your favorite gluten-free yellow cake mix
- Dairy-free alternative: Use dairy-free whipped topping and ensure your caramel topping is dairy-free
- Homemade cake base: Substitute 2 cups flour, 1 1/3 cups sugar, 1/3 cup butter, 1 1/2 tsp baking powder, 1/2 tsp salt, 2/3 cup milk, and 1 egg if you prefer making from scratch
- Caramel substitute: Dulce de leche works beautifully in place of caramel topping
- Toffee alternatives: Crushed butterscotch chips, mini chocolate chips, or chopped chocolate-covered coffee beans
Instructions
Preheat your oven to 350°F and grease a 9×13-inch baking pan thoroughly. In a large mixing bowl, combine the cake mix, melted butter, water, and eggs. Mix until just combined – don’t overwork the batter as this can make the cake tough. The mixture will be thicker than regular cake batter, which is exactly what you want for a sturdy base layer.
Press the batter evenly into your prepared pan using clean hands or an offset spatula. The layer should be uniform to ensure even baking and a level foundation for your toppings.
Bake for 25-30 minutes until the cake is golden brown and springs back lightly when touched in the center. Don’t overbake, as the cake will continue cooking slightly from residual heat. While the cake bakes, you’ll notice a wonderful buttery aroma filling your kitchen – this is your first sign that something amazing is in the works.
Remove from the oven and immediately use a wooden skewer or fork to poke holes evenly across the entire surface, spacing them about an inch apart. These holes are crucial as they allow the caramel to seep into the cake, creating that signature moist, flavorful base.
While the cake is still warm, combine the sweetened condensed milk, caramel topping, and butter in a microwave-safe bowl. Microwave in 30-second intervals, stirring between each, until the mixture is smooth and pourable. This usually takes 1-2 minutes total.
Pour the warm caramel mixture over the cake immediately, using a spoon to gently spread it and ensure it fills all the holes. The caramel will seem like a lot, but trust the process – it will absorb into the cake beautifully as it cools.
Allow the cake to cool completely to room temperature, about 45 minutes. This step requires patience, but it’s essential for the structural integrity of your bars. Once cooled, spread the whipped topping evenly over the caramel layer using a gentle hand to avoid mixing the layers.
Finally, sprinkle the toffee bits evenly over the whipped topping, pressing them lightly to help them adhere. Add chopped pecans if using, which provide a lovely contrast to the sweet layers.
Cover the pan tightly with plastic wrap and refrigerate for at least 2 hours, though overnight is even better. This chilling time allows all the flavors to meld and makes cutting clean, professional-looking squares much easier.
Nutrition
- Calories: 380
- Sugar: 45g
- Sodium: 320mg
- Fat: 16g
- Carbohydrates: 58g
- Protein: 6g