
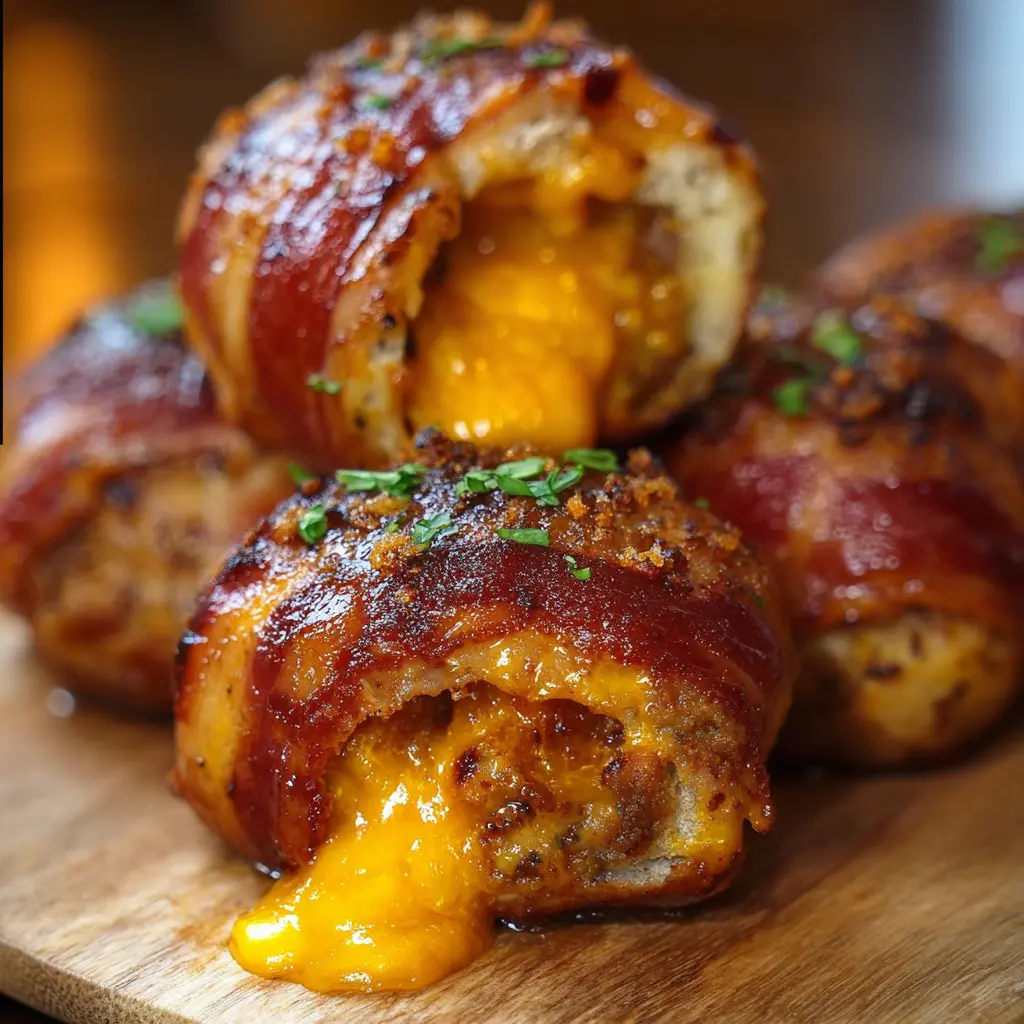
Cheddar-Stuffed BBQ Bacon Bombs are more than just delicious bites – they’re a way to bring people together around the grill. There’s something deeply satisfying about watching these little parcels of joy transform from simple ingredients into golden, sizzling perfection. The irresistible aroma alone will have your neighbors peeking over the fence, curious about the culinary masterpiece you’re creating.
This recipe takes the beloved concept of stuffed bacon and elevates it to party-worthy status. Whether you’re planning a weekend BBQ, game day spread, or just want to treat your family to something extraordinary, these Cheddar-Stuffed BBQ Bacon Bombs deliver restaurant-quality results right in your backyard.
Ingredients List
For the Meat Mixture:
- 1 pound ground beef (80/20 blend for best flavor)
- 1 cup sharp cheddar cheese, cubed into small pieces
- 1/4 cup cream cheese, softened
- 2 tablespoons BBQ seasoning
- 1 teaspoon garlic powder
- 1/2 teaspoon onion powder
- Salt and pepper to taste
For the Bacon Wrap:
- 12-15 strips thick-cut bacon
- Toothpicks for securing
For the BBQ Glaze:
- 1/2 cup BBQ sauce (your favorite brand)
- 2 tablespoons brown sugar
- 1 tablespoon apple cider vinegar
- 1 teaspoon Worcestershire sauce
Substitution Ideas:
- Cheese alternatives: Try pepper jack for heat, gouda for smokiness, or mozzarella for extra stretch
- Meat options: Ground pork, turkey, or a beef-pork blend work beautifully
- Gluten-free: Ensure your BBQ sauce and seasonings are certified gluten-free
- Lower sodium: Use turkey bacon and low-sodium seasonings
Timing
Total Time: 45 minutes
- Prep Time: 20 minutes
- Cook Time: 25 minutes
Time Management Tips:
The beauty of this recipe lies in its make-ahead friendly nature. You can assemble the bacon bombs up to 4 hours before cooking and refrigerate them. This actually helps the flavors meld together beautifully. While your grill preheats, use those 10 minutes to prepare your glaze and set up your serving area. The active cooking time is minimal – most of the work happens while they’re sizzling away on the grill.
How to Make It
1. Prepare the Filling
Start by combining the ground beef, softened cream cheese, garlic powder, onion powder, and BBQ seasoning in a large mixing bowl. Use your hands to gently mix everything together – this ensures even distribution without overworking the meat. The mixture should feel cohesive but not dense. Fold in the cubed cheddar cheese last, making sure each portion will have plenty of cheesy goodness.
2. Form the Bombs
Divide your meat mixture into 12 equal portions, roughly the size of a golf ball. Roll each portion gently between your palms to create smooth, round shapes. Don’t pack them too tightly – you want them to stay tender during cooking. The cream cheese in the mixture helps bind everything while keeping the texture moist and delicious.
3. Wrap with Bacon
Take each meat ball and carefully wrap it with a strip of bacon, starting at one end and spiraling around until the entire surface is covered. Secure the end with a toothpick. The bacon should overlap slightly to ensure complete coverage. This step is like wrapping a present – take your time to make them look neat and ensure even cooking.
4. Prepare the Grill
Preheat your grill to medium heat (around 350°F). If using a charcoal grill, arrange coals to create zones of direct and indirect heat. For gas grills, heat one side to medium and leave the other side cooler. This setup gives you control over the cooking process and prevents the bacon from burning before the meat is fully cooked.
5. Make the Glaze
While the grill heats up, whisk together the BBQ sauce, brown sugar, apple cider vinegar, and Worcestershire sauce in a small bowl. The brown sugar adds a beautiful caramelized finish, while the vinegar provides a subtle tang that cuts through the richness. This glaze will become your secret weapon for that glossy, appetizing finish.
6. Grill the Bacon Bombs
Place the bacon bombs on the cooler side of the grill first, allowing them to cook through gently for about 15 minutes. Turn them every 5 minutes to ensure even browning. During the last 5 minutes, move them to the hotter side to crisp up the bacon. Brush with the glaze during the final 3 minutes, allowing it to caramelize but not burn.
7. Rest and Serve
Remove the bacon bombs from the grill and let them rest for 3-4 minutes. This brief resting period allows the juices to redistribute and the cheese to set slightly, preventing a molten cheese explosion when you bite into them. Remove the toothpicks before serving and watch them disappear!
Nutritional Information
Each bacon bomb contains approximately:
- Calories: 280-320
- Protein: 18-22 grams
- Fat: 20-24 grams
- Carbohydrates: 4-6 grams
These little powerhouses provide substantial protein from both the beef and bacon, making them surprisingly satisfying. The cheese contributes calcium and additional protein, while the relatively low carbohydrate content makes them suitable for various eating styles. Keep in mind that nutritional values may vary depending on your specific ingredients and portion sizes.
Healthier Alternatives for the Recipe
Leaner Protein Options:
Substitute ground turkey or chicken (93/7 lean) for a lighter version. Add an extra tablespoon of cream cheese to maintain moisture. You can also try a 50/50 blend of ground beef and turkey for the best of both worlds.
Bacon Alternatives:
Turkey bacon reduces the overall fat content while still providing that smoky flavor. For an even lighter option, try thinly sliced prosciutto, which crisps beautifully and adds a sophisticated touch.
Cheese Modifications:
Reduced-fat sharp cheddar maintains flavor while cutting calories. Part-skim mozzarella creates an incredibly stretchy, satisfying bite with less saturated fat.
Seasoning Swaps:
Create your own low-sodium BBQ seasoning blend using smoked paprika, garlic powder, onion powder, and a touch of brown sugar. This gives you complete control over the salt content without sacrificing flavor.
Serving Suggestions
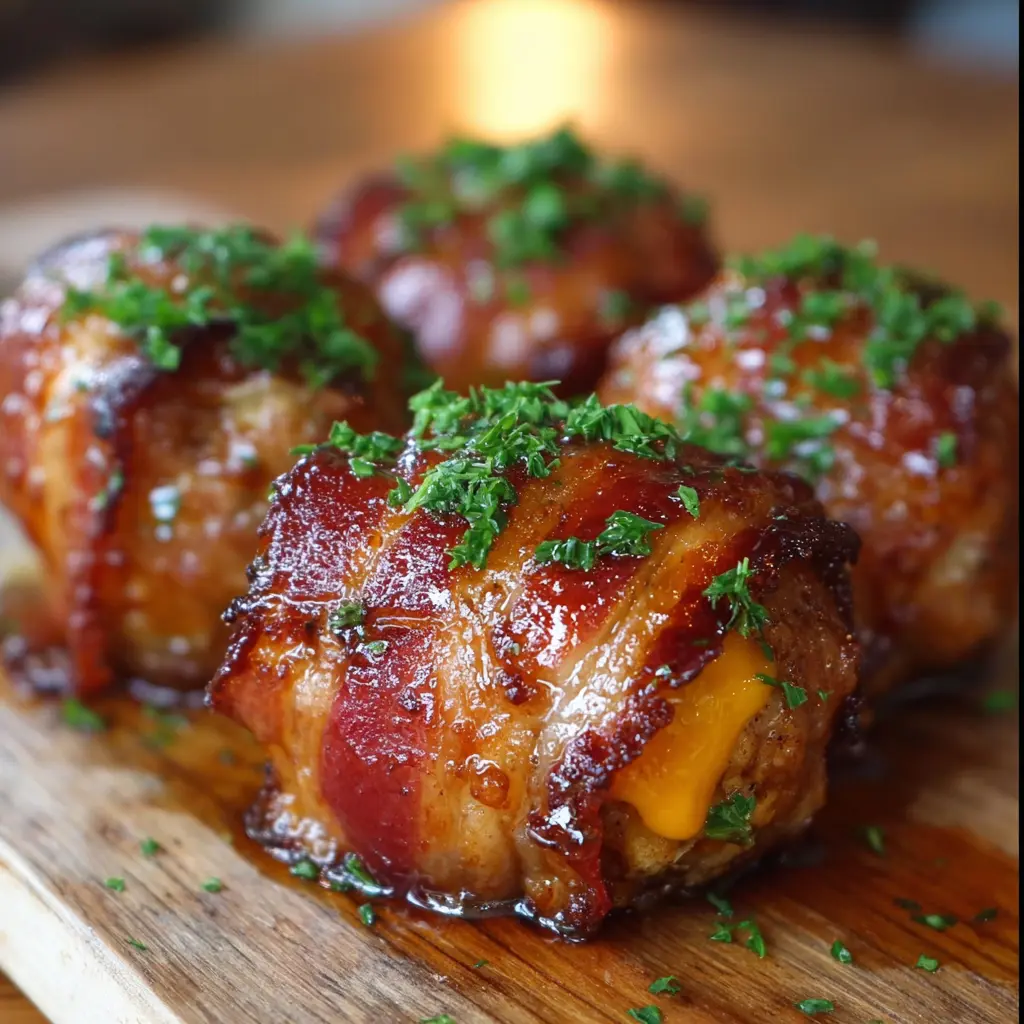
These bacon bombs shine as the star of any appetizer spread. Arrange them on a wooden cutting board with small bowls of extra BBQ sauce, ranch dressing, and spicy mustard for dipping. The presentation becomes part of the experience – your guests will love the rustic, authentic feel.
For a complete meal, pair them with classic BBQ sides like coleslaw, baked beans, and corn on the cob. The fresh crunch of coleslaw provides a perfect contrast to the rich, smoky bacon bombs. Consider serving 2-3 per person as an appetizer, or 4-5 as a main course.
During football season, these are absolute game-changers for tailgating. They transport well in a warming tray and stay delicious even when they cool down slightly. For summer gatherings, serve alongside fresh watermelon and cold beer – the combination is pure perfection.
Common Mistakes to Avoid
Overworking the Meat: Mix the filling ingredients just until combined. Overworking creates dense, tough texture instead of the tender, juicy result you want.
Bacon Too Thin: Thin bacon burns before the meat cooks through. Stick with thick-cut bacon for the best results and easier handling.
Skipping the Rest Period: Cutting into hot bacon bombs immediately causes all the melted cheese to run out. Those few minutes of patience make all the difference.
Too High Heat: High heat burns the bacon exterior while leaving the center undercooked. Medium heat allows everything to cook evenly and develop that perfect crispy-outside, juicy-inside texture.
Forgetting to Remove Toothpicks: Always do a final check before serving. Nobody wants to bite into a wooden surprise!
Storing Tips for the Recipe
Refrigerator Storage:
Cooked bacon bombs keep beautifully in the refrigerator for up to 4 days. Store them in an airtight container, and they’ll maintain their delicious flavor. For best results, let them come to room temperature for 10 minutes before reheating.
Freezing:
You can freeze both uncooked and cooked bacon bombs for up to 3 months. Wrap individually in plastic wrap, then place in a freezer bag. Uncooked bombs can go straight from freezer to grill – just add 5-10 minutes to the cooking time.
Reheating:
The oven is your best friend for reheating. Place them on a baking sheet at 350°F for 8-10 minutes, or until heated through. This method maintains the bacon’s crispiness better than microwaving.
Make-Ahead Tips:
Assemble the bacon bombs up to 24 hours in advance and refrigerate. This actually improves the flavor as the seasonings have time to meld together. Just remember to let them come to room temperature for 15 minutes before grilling.
Conclusion
These Cheddar-Stuffed BBQ Bacon Bombs represent everything wonderful about backyard cooking – they’re fun to make, incredible to eat, and guaranteed to create lasting memories with friends and family. The combination of smoky bacon, perfectly seasoned beef, and melted cheddar creates a flavor experience that’s both familiar and exciting.
What makes this recipe truly special is its versatility and forgiving nature. Whether you’re a grilling novice or a seasoned pitmaster, these bacon bombs deliver consistent, crowd-pleasing results every time. The technique is simple enough for weekend cooking but impressive enough for special occasions.
Fire up that grill, gather your ingredients, and get ready to become the hero of your next gathering. Don’t forget to snap a photo before they all disappear – trust me, you’ll want to remember the smiles on everyone’s faces when they bite into these incredible bacon bombs!
FAQs
Can I cook these in the oven instead of on the grill?
Absolutely! Bake them at 375°F for 20-25 minutes on a wire rack set over a baking sheet. This allows air circulation around the bacon for even crisping. Brush with glaze during the last 5 minutes.
What’s the best way to tell when they’re done?
The bacon should be golden brown and crispy, and the internal temperature should reach 160°F. The meat will feel firm when gently pressed, and any visible cheese should be melted and bubbly.
Can I make these ahead for a party?
Yes! Assemble them up to 24 hours in advance and refrigerate. You can even cook them earlier in the day and reheat in a 350°F oven for 8-10 minutes before serving.
What if my bacon keeps unraveling during cooking?
Use toothpicks generously – don’t be shy about using 2-3 per bomb if needed. Also, make sure your bacon is at room temperature when wrapping, as cold bacon is more likely to crack and separate.
Can I use different types of cheese?
Definitely! Pepper jack adds heat, gouda brings smokiness, and even cream cheese mixed with herbs creates a delicious variation. Just cube harder cheeses and ensure softer cheeses are well-incorporated into the meat mixture.
How do I prevent the cheese from leaking out?
Make sure your meat mixture completely encases the cheese cubes, and don’t overstuff. The cream cheese in the mixture helps bind everything together and reduces leakage during cooking.

Cheddar-Stuffed BBQ Bacon Bombs Recipe
- Total Time: 45 minutes
- Yield: Serves 4–6 people 1x
Description
What makes these bacon bombs truly special isn’t just their incredible taste – it’s how they bring people together around the grill. There’s something deeply satisfying about watching these little parcels of joy transform from simple ingredients into golden, sizzling perfection. The aroma alone will have your neighbors peeking over the fence, wondering what culinary masterpiece you’re creating.
Ingredients
For the Meat Mixture:
- 1 pound ground beef (80/20 blend for best flavor)
- 1 cup sharp cheddar cheese, cubed into small pieces
- 1/4 cup cream cheese, softened
- 2 tablespoons BBQ seasoning
- 1 teaspoon garlic powder
- 1/2 teaspoon onion powder
- Salt and pepper to taste
For the Bacon Wrap:
- 12–15 strips thick-cut bacon
- Toothpicks for securing
For the BBQ Glaze:
- 1/2 cup BBQ sauce (your favorite brand)
- 2 tablespoons brown sugar
- 1 tablespoon apple cider vinegar
- 1 teaspoon Worcestershire sauce
Substitution Ideas:
- Cheese alternatives: Try pepper jack for heat, gouda for smokiness, or mozzarella for extra stretch
- Meat options: Ground pork, turkey, or a beef-pork blend work beautifully
- Gluten-free: Ensure your BBQ sauce and seasonings are certified gluten-free
- Lower sodium: Use turkey bacon and low-sodium seasonings
Instructions
Start by combining the ground beef, softened cream cheese, garlic powder, onion powder, and BBQ seasoning in a large mixing bowl. Use your hands to gently mix everything together – this ensures even distribution without overworking the meat. The mixture should feel cohesive but not dense. Fold in the cubed cheddar cheese last, making sure each portion will have plenty of cheesy goodness.
Divide your meat mixture into 12 equal portions, roughly the size of a golf ball. Roll each portion gently between your palms to create smooth, round shapes. Don’t pack them too tightly – you want them to stay tender during cooking. The cream cheese in the mixture helps bind everything while keeping the texture moist and delicious.
Take each meat ball and carefully wrap it with a strip of bacon, starting at one end and spiraling around until the entire surface is covered. Secure the end with a toothpick. The bacon should overlap slightly to ensure complete coverage. This step is like wrapping a present – take your time to make them look neat and ensure even cooking.
Preheat your grill to medium heat (around 350°F). If using a charcoal grill, arrange coals to create zones of direct and indirect heat. For gas grills, heat one side to medium and leave the other side cooler. This setup gives you control over the cooking process and prevents the bacon from burning before the meat is fully cooked.
While the grill heats up, whisk together the BBQ sauce, brown sugar, apple cider vinegar, and Worcestershire sauce in a small bowl. The brown sugar adds a beautiful caramelized finish, while the vinegar provides a subtle tang that cuts through the richness. This glaze will become your secret weapon for that glossy, appetizing finish.
Place the bacon bombs on the cooler side of the grill first, allowing them to cook through gently for about 15 minutes. Turn them every 5 minutes to ensure even browning. During the last 5 minutes, move them to the hotter side to crisp up the bacon. Brush with the glaze during the final 3 minutes, allowing it to caramelize but not burn.
Remove the bacon bombs from the grill and let them rest for 3-4 minutes. This brief resting period allows the juices to redistribute and the cheese to set slightly, preventing a molten cheese explosion when you bite into them. Remove the toothpicks before serving and watch them disappear!
Nutrition
- Calories: 280-320
- Fat: 20-24 grams
- Carbohydrates: 4-6 grams
- Protein: 18-22 grams