
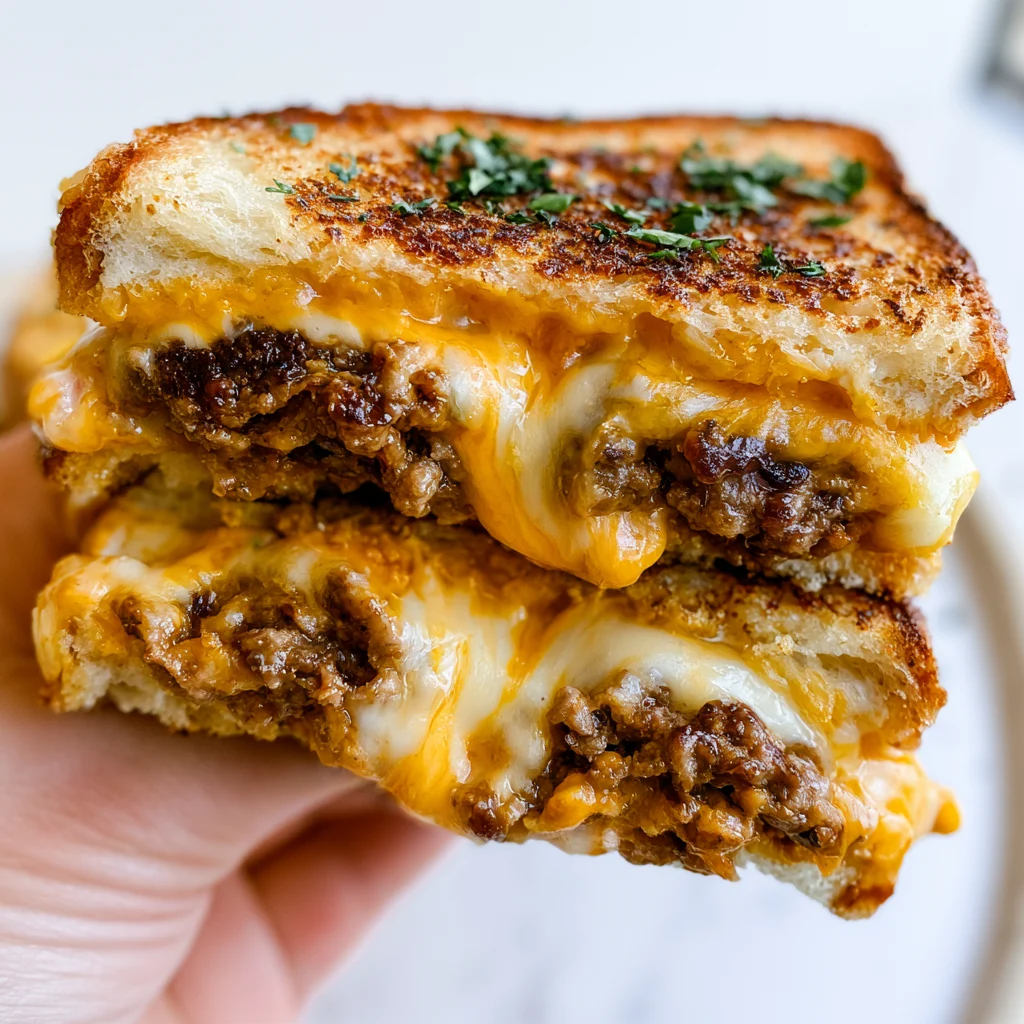
There’s something magical about combining two beloved comfort foods into one ridiculously delicious creation. The Smashburger Grilled Cheese does exactly that, bringing together the crispy-edged, juicy goodness of a smashburger with the gooey, melted perfection of grilled cheese. I first discovered this genius combination during a late-night craving session when I couldn’t decide between a burger and grilled cheese. Why not both, I thought? That decision changed my weeknight dinner game forever.
What makes this recipe truly special is its simplicity paired with maximum flavor payoff. You don’t need fancy ingredients or complicated techniques – just good quality beef, your favorite cheese, and the willingness to press that meat firmly onto hot bread. The result? A sandwich that rivals anything you’d get at a trendy burger joint, made right in your own kitchen in under 15 minutes.
Ingredients List
For the Smashburgers:
- 8 oz ground beef (80/20 blend works best)
- Salt and black pepper to taste
- 1/2 teaspoon garlic powder
- 1/2 teaspoon onion powder
For the Grilled Cheese:
- 4 slices of your favorite bread (white, sourdough, or brioche recommended)
- 3 tablespoons butter, softened
- 4 slices American cheese (or cheddar for a sharper flavor)
- 2 slices deli cheese (optional, for extra meltiness)
Optional Add-ons:
- 2 tablespoons mayonnaise (for tanginess)
- Pickles, sliced
- Caramelized onions
- Special sauce or burger sauce
Substitution Suggestions:
If you don’t have American cheese, try provolone or Monterey Jack for excellent melting properties. Ground turkey can replace beef for a leaner option, though you’ll want to add a touch of olive oil to prevent dryness. For a gourmet twist, swap regular bread for Texas toast or pretzel buns sliced in half.
Timing
Prep Time: 5 minutes
Cook Time: 8-10 minutes
Total Time: 13-15 minutes
Servings: 2 sandwiches
Time Management Tip: Have all your ingredients prepped and within arm’s reach before you start cooking. This recipe moves quickly once you begin, and you’ll want everything ready to assemble while the meat is still hot. You can divide the ground beef into portions ahead of time and keep them refrigerated until ready to cook.
How to Make It
1. Prepare Your Workspace and Ingredients
Begin by dividing your ground beef into four equal portions, roughly 2 ounces each. Don’t shape them into patties yet – just loose balls of meat. Season each portion generously with salt, black pepper, garlic powder, and onion powder. This is crucial because the seasoning creates that delicious crust we’re after. Butter one side of each bread slice evenly from edge to edge. The butter creates the golden-brown crispiness that makes grilled cheese irresistible, and it’ll also help the meat adhere better.
Set up your assembly line: seasoned meat balls, buttered bread, cheese slices, and a sturdy spatula. You’ll also want a second spatula or something flat and heavy for smashing – a small pot or bacon press works perfectly. Why this matters: Having everything organized prevents scrambling mid-cook when timing is critical.
2. Start the First Smash
Heat a large skillet or griddle over medium-high heat. You want it hot – around 400°F if you’re measuring. Place two slices of bread butter-side down in the pan. Listen for that immediate sizzle; that’s your cue the temperature is right. Immediately place one portion of seasoned beef onto the center of each bread slice while it’s in the pan.
Now comes the fun part: using your spatula and that heavy implement, press down HARD on the meat. We’re talking serious pressure here – you want to smash it as thin as possible, creating maximum contact with the bread. Hold for about 10 seconds. You’ll hear an aggressive sizzle and smell that incredible browning aroma – that’s the Maillard reaction creating complex, savory flavors. The meat should spread to nearly cover the entire bread slice. This technique is what transforms ordinary ground beef into something extraordinary, creating crispy, lacy edges that taste like concentrated burger essence.
3. Cook and Flip with Precision
Let the meat cook undisturbed for 2-3 minutes. You’re looking for the edges to turn deeply brown and crispy – they should look almost lacy and caramelized. The beef will release some fat, which is exactly what you want; it’ll fry the bread from underneath, creating incredible flavor. Resist the urge to move things around.
Using your spatula, carefully flip the entire bread-and-meat unit over. The bread should be gorgeously golden brown, and the meat should be well-adhered to it. If any meat tries to separate, just press it back down. Let this side cook for about 1 minute – just enough to finish cooking the meat through while the unbuttered side of the bread toasts slightly from the residual heat and beef fat. This step matters because it ensures the meat is fully cooked while maintaining that crispy texture we’ve worked to achieve.
4. Add Cheese and Build the Sandwich
While the meat side is cooking, place your cheese slices directly onto the cooked meat. The heat will begin melting it immediately. You’ll see it start to soften and get glossy around the edges – that’s your visual cue it’s working. If you’re using two types of cheese, layer them for optimal meltiness.
Reduce the heat to medium-low. Take your remaining two bread slices (buttered side facing up) and place them directly on top of the cheese, creating a sandwich. Press down gently. The steam from the hot meat will help melt the cheese while the bottom continues to crisp. This layering technique ensures the cheese melts evenly throughout rather than just on the surface.
5. Final Flip and Golden Perfection
After about 2 minutes, when the bottom bread is deep golden brown and crispy, it’s time for the final flip. Slide your spatula under the entire sandwich and flip it confidently. The top (now bottom) should sizzle as the buttered surface hits the pan. You’ll smell that toasty, buttery aroma intensify.
Cook for another 2-3 minutes until this final side achieves that perfect golden-brown color. The cheese inside should be completely melted and oozy – you might see a little escaping from the sides, which is perfectly fine. Press down gently with your spatula occasionally to help the cheese spread throughout and ensure even browning. The sandwich should feel sturdy when you press it, and the bread should sound crispy when tapped with your spatula.
6. Rest and Serve
Remove the Smashburger Grilled Cheese from the heat and let it rest on a cutting board for about 1 minute. This brief rest allows the cheese to set just slightly, preventing it from completely running out when you cut. It also lets the bread firm up a touch while staying crispy.
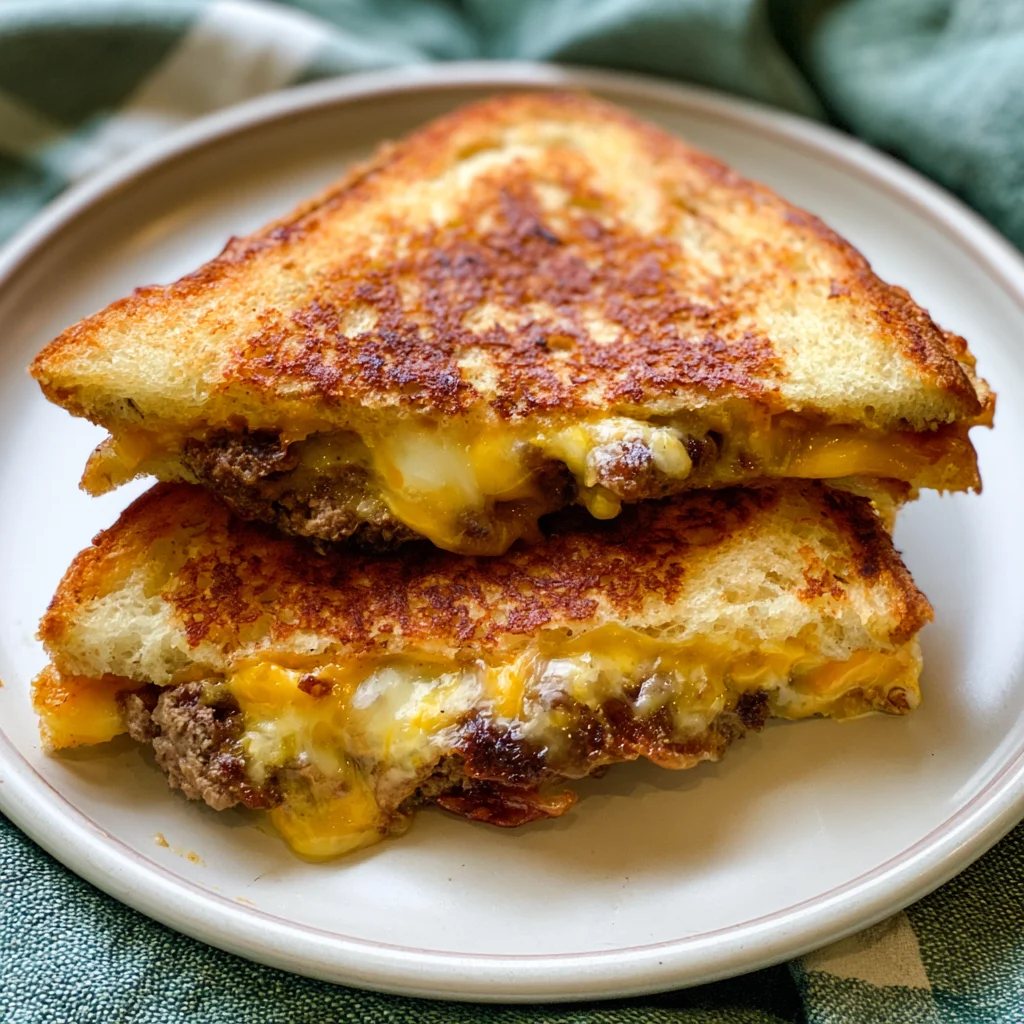
Slice diagonally with a sharp knife – the diagonal cut isn’t just for presentation; it makes the sandwich easier to handle and showcases all those beautiful layers. You should see distinct layers: crispy bread, melted cheese, seasoned beef with those caramelized edges, more cheese, and crispy bread again. Serve immediately while still hot and the cheese is at peak gooeyness.
Nutritional Information
Per Serving (1 sandwich):
- Calories: 620
- Protein: 32g
- Total Carbohydrates: 28g
- Total Fat: 42g
- Saturated Fat: 20g
- Fiber: 1g
- Sodium: 980mg
This Smashburger Grilled Cheese provides substantial protein from the beef and cheese, making it surprisingly satisfying. The fat content comes primarily from the beef and cheese, contributing to the rich flavor and satisfying texture. While indulgent, it delivers quality protein and energy. These values are approximate and will vary based on your specific ingredients and bread choice.
Serving Suggestions
This hearty sandwich pairs beautifully with crispy sweet potato fries or classic shoestring fries for that complete diner experience. A simple side salad with tangy vinaigrette cuts through the richness perfectly, or try crunchy pickle spears and coleslaw for a traditional burger joint vibe.
For presentation, serve on a wooden board or simple white plate that lets the golden-brown sandwich take center stage. A small ramekin of special sauce or ketchup alongside adds visual appeal and extra flavor options.
One sandwich makes a filling meal for most people, but lighter eaters might want to share one with a generous side. Teenagers and very hungry adults will likely want the full sandwich to themselves.
Common Mistakes to Avoid
Using lean ground beef: The 80/20 blend is essential for flavor and moisture. Leaner beef (90/10 or 93/7) results in dry, less flavorful burgers that don’t crisp up properly. The fat content creates that delicious crust and keeps everything juicy.
Not smashing hard enough: Timid pressing won’t create the signature crispy edges and caramelization that make this special. Use real force – you want the meat paper-thin in spots for maximum crispiness.
Cooking over too-low heat: Medium-high heat is necessary for proper browning and crisping. Too low, and you’ll steam the meat instead of searing it, resulting in a soggy, grey sandwich instead of a crispy, golden one.
Skipping the resting time: Cutting immediately causes all the melted cheese to run out onto your plate. That one-minute rest makes a significant difference in keeping your sandwich intact and enjoyable to eat.
Storing Tips
Refrigerator Storage: These sandwiches are truly best enjoyed fresh, but leftovers can be wrapped tightly in aluminum foil and refrigerated for up to 2 days. The bread will soften considerably, but the flavors remain good.
Freezer Storage: Freezing isn’t recommended as the texture of both the bread and cheese suffer significantly upon thawing and reheating.
Reheating Method: The best way to reheat is in a skillet over medium heat for 3-4 minutes per side. This re-crisps the bread while warming the interior. Avoid the microwave, which will make the bread soggy and rubbery. An air fryer at 350°F for 4-5 minutes also works wonderfully for restoring some crispness.
Conclusion
This Smashburger Grilled Cheese represents everything great about comfort food – it’s simple, satisfying, and utterly delicious. The combination of crispy, buttery bread, seasoned caramelized beef, and gooey melted cheese creates a flavor and texture experience that’s truly greater than the sum of its parts. Once you’ve mastered this basic technique, you’ll find yourself making it on repeat, maybe experimenting with different cheeses, adding bacon, or trying various special sauces.
The beauty of this recipe lies in its versatility and speed. It’s fancy enough to impress but simple enough for a Tuesday night dinner. Give it a try tonight, and I guarantee you’ll understand why this mashup has become such a phenomenon. Don’t forget to check out more inspiration on recipe boards for additional variations!
I’d love to hear how your Smashburger Grilled Cheese turns out! Drop a comment below with your favorite cheese combination or any creative add-ins you tried.
FAQs
Can I make this without butter on the bread?
Yes, you can use mayonnaise instead of butter on the outside of the bread. It creates an equally golden, crispy exterior with a slightly tangier flavor. Some people actually prefer the mayo method for its even browning properties.
What if I don’t have a heavy press for smashing?
A regular sturdy spatula works fine with firm pressure. Alternatively, use the bottom of a small pot, a bacon press, or even a smaller skillet. The key is applying consistent, heavy pressure for 10 seconds to flatten the meat completely.
Can I prep these ahead for a party?
You can portion and season the meat ahead, but these must be cooked fresh to order. The crispy texture and melted cheese are best experienced immediately. Consider setting up a cooking station and making them in batches for gatherings.
Why is my cheese not melting properly?
Lower your heat after flipping and cover the pan with a lid for 30 seconds to trap steam, which helps melt the cheese. Also, ensure you’re using good melting cheeses like American, cheddar, or provolone rather than aged or hard cheeses.
Can I use pre-formed burger patties?
Fresh ground beef works best because you need to smash it directly onto the bread while raw. Pre-formed patties are already compressed and won’t adhere properly to the bread or create those signature crispy edges we’re after.
Smashburger Grilled Cheese
Ingredients
For the Smashburgers
- 8 oz ground beef (80/20 blend)
- to taste salt and black pepper
- 1/2 teaspoon garlic powder
- 1/2 teaspoon onion powder
For the Grilled Cheese
- 4 slices bread (white, sourdough, or brioche recommended)
- 3 tablespoons butter, softened
- 4 slices American cheese (or cheddar)
- 2 slices deli cheese (optional)
Optional Add-ons
- 2 tablespoons mayonnaise
- pickles, sliced
- caramelized onions
- special sauce or burger sauce
Instructions
- Divide ground beef into four equal portions (about 2 ounces each) – don’t shape into patties, just loose balls. Season each portion generously with salt, black pepper, garlic powder, and onion powder.
- Butter one side of each bread slice evenly from edge to edge. Set up assembly line with seasoned meat balls, buttered bread, cheese slices, and a sturdy spatula. Have a second spatula or heavy implement ready for smashing.
- Heat a large skillet or griddle over medium-high heat to about 400°F. Place two slices of bread butter-side down in the pan.
- Immediately place one portion of seasoned beef onto the center of each bread slice while in the pan. Press down HARD on the meat using spatula and heavy implement, smashing as thin as possible. Hold for about 10 seconds until meat spreads to nearly cover the entire bread slice.
- Let the meat cook undisturbed for 2-3 minutes until edges turn deeply brown and crispy with lacy, caramelized appearance.
- Carefully flip the entire bread-and-meat unit over using spatula. Let cook for about 1 minute to finish cooking the meat while unbuttered side of bread toasts.
- Place cheese slices directly onto the cooked meat. Reduce heat to medium-low.
- Take remaining two bread slices (buttered side facing up) and place directly on top of cheese, creating a sandwich. Press down gently.
- After about 2 minutes, when bottom bread is deep golden brown and crispy, flip the entire sandwich. Cook for another 2-3 minutes until final side achieves perfect golden-brown color. Press down gently with spatula occasionally.
- Remove from heat and let rest on cutting board for about 1 minute to allow cheese to set slightly.
- Slice diagonally with sharp knife and serve immediately while hot.