
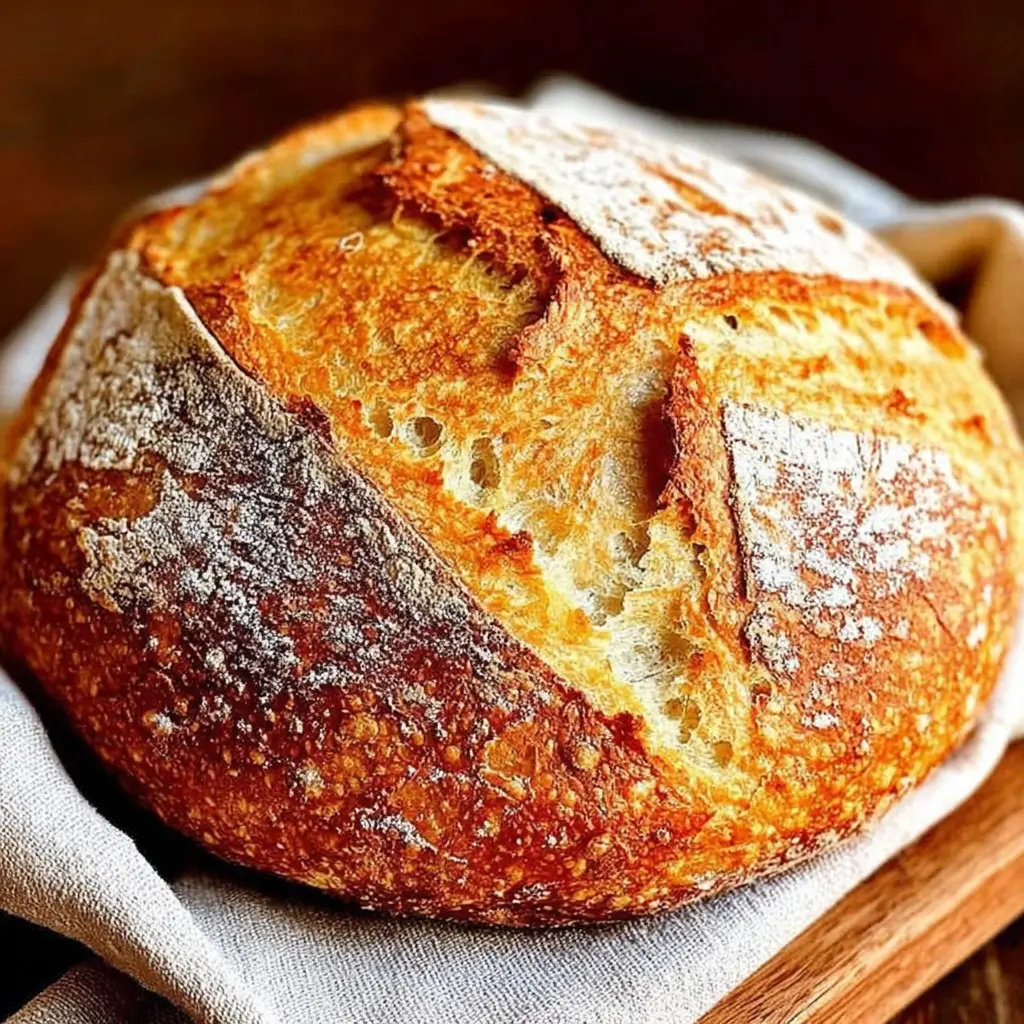
The tangy aroma of fresh sourdough bread rising in your kitchen creates a connection to thousands of years of baking tradition. Creating a sourdough starter might seem mysterious, but it’s actually one of the most rewarding projects you can embark on in your culinary journey. This living culture of wild yeast and beneficial bacteria transforms simple flour and water into a bubbling, aromatic powerhouse that will elevate your bread-baking adventures.
Your homemade sourdough starter becomes like a beloved pet – requiring daily attention and care, but rewarding you with incredible flavor and texture in return. Unlike commercial yeast, this ancient method of leavening develops complex, nuanced flavors while making bread more digestible. The beauty lies in its simplicity: just two ingredients and patience create something truly magical.
Ingredients List
Basic Starter Ingredients:
- 4 cups all-purpose flour (unbleached works best for wild yeast cultivation)
- 4 cups room temperature water (filtered or dechlorinated to avoid inhibiting yeast growth)
Alternative Flour Options:
- Whole wheat flour – Creates a more robust, earthy starter with faster fermentation
- Rye flour – Develops intense flavor and attracts wild yeast effectively
- Bread flour – Higher protein content creates stronger starter activity
Equipment Needed:
- Large glass jar or plastic container (avoid metal which can react with acids)
- Clean kitchen towel or coffee filter
- Rubber band or string
- Wooden or plastic spoon for stirring
The beauty of sourdough starter lies in its minimalist ingredient list. Choose organic, unbleached flour when possible, as it contains more wild yeast and nutrients. Your water quality matters too – chlorinated tap water can inhibit yeast growth, so let it sit overnight to dechlorinate or use filtered water.
Timing
Total Development Time: 5-7 days
Daily Active Time: 5 minutes
Feeding Schedule: Once daily at consistent times
Timeline Breakdown:
- Days 1-2: Initial mixture and first signs of activity
- Days 3-4: Increased bubbling and tangy aroma development
- Days 5-7: Mature starter ready for baking
The most crucial element is consistency. Feed your starter at the same time each day to establish a reliable rhythm. Morning feedings work well since you can observe activity throughout the day. Room temperature significantly affects timing – warmer kitchens accelerate fermentation while cooler spaces slow the process.
How to Make It
1. Create Your Initial Mixture
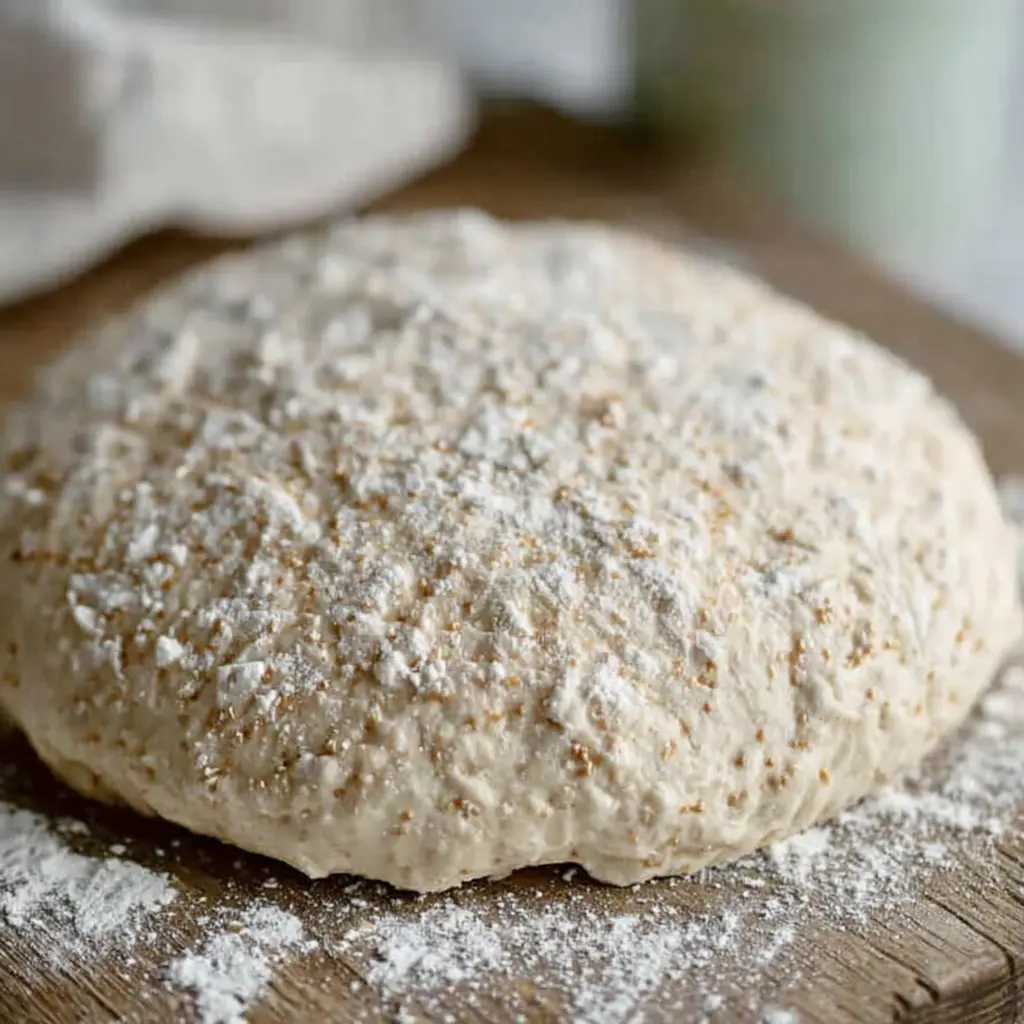
In your clean jar, combine 1/2 cup flour with 1/2 cup room temperature water. Stir thoroughly with a clean spoon until no dry flour remains visible. The mixture should resemble thick pancake batter with a smooth, uniform consistency. Cover loosely with a kitchen towel secured with a rubber band, allowing air circulation while preventing dust and insects from entering.
Place your starter in a warm, draft-free location like the top of your refrigerator or inside an oven with just the light on. Consistency in location helps maintain steady temperatures for optimal yeast development.
2. Begin Daily Feeding Routine
Starting on day two, establish your feeding schedule. Discard half of your existing starter (this prevents overgrowth and maintains proper ratios). Add 1/2 cup fresh flour and 1/2 cup room temperature water, stirring until well combined. The discarding process might feel wasteful initially, but it’s essential for maintaining a healthy, active culture.
Look for small bubbles forming within 12-24 hours, indicating wild yeast activity. The mixture may develop a slightly alcoholic or vinegary smell – this is completely normal and shows fermentation is occurring.
3. Monitor and Adjust
Days three and four typically bring increased activity. Your starter should begin doubling in size within 4-8 hours after feeding, creating a dome-like surface covered in bubbles. The aroma evolves from yeasty to pleasantly tangy. If you notice liquid forming on top, simply stir it back in – this “hooch” indicates your starter is hungry and ready for feeding.
Temperature fluctuations affect activity levels. Cooler conditions slow fermentation while warmth accelerates it. Adjust feeding frequency based on your starter’s behavior rather than strict schedules.
4. Test for Readiness
By days five through seven, your sourdough starter should pass the “float test.” Drop a spoonful of freshly fed starter into a glass of water – if it floats, the starter contains enough gas production for bread making. A mature starter doubles in size predictably and maintains a pleasant, tangy aroma without any off-putting smells.
Consistency in timing becomes crucial now. Your starter should peak (reach maximum height) at regular intervals, typically 4-12 hours after feeding depending on temperature and flour type.
5. Establish Long-term Maintenance
Once established, your starter can live indefinitely with proper care. For daily baking, continue the feeding routine at room temperature. For weekly baking, refrigerate your starter and feed it once weekly. The cold environment slows fermentation dramatically, reducing maintenance while preserving the culture.
Before using refrigerated starter, bring it to room temperature and feed it. Wait until it shows signs of activity before incorporating it into recipes.
Nutritional Information
Per 1/4 cup of mature starter (approximate):
- Calories: 120
- Carbohydrates: 25g
- Protein: 4g
- Fat: 0.5g
- Fiber: 2g
Sourdough fermentation creates beneficial changes in grain structure, making nutrients more bioavailable. The fermentation process breaks down gluten proteins partially, potentially making bread more digestible for some individuals. Wild yeast and lactobacilli bacteria contribute to gut health while creating natural preservatives that extend bread freshness.
The slow fermentation process develops complex B vitamins and reduces phytic acid content, improving mineral absorption. Unlike commercial yeast bread, sourdough typically has a lower glycemic index due to the acidification process.
Healthier Alternatives for the Recipe
Whole Grain Variations:
Replace up to 50% of all-purpose flour with whole wheat or spelt flour for increased fiber and nutrients. These alternatives create more active starters with robust flavors but require slightly more frequent feeding due to higher enzyme activity.
Gluten-Free Options:
Create gluten-free starters using brown rice flour, buckwheat flour, or gluten-free flour blends. These starters often take longer to establish but produce excellent results for gluten-sensitive individuals. Maintain the same ratios but expect different textures and fermentation speeds.
Reduced Environmental Impact:
Use locally milled, organic flours when available to support sustainable agriculture. Consider saving and using sourdough discard in pancakes, crackers, or quick breads to minimize waste.
Serving Suggestions
Your mature sourdough starter opens doors to countless culinary possibilities beyond basic bread. Create artisanal pizza dough with complex flavors, fluffy pancakes for weekend mornings, or crispy crackers for appetizer spreads. The tangy flavor complements both sweet and savory applications beautifully.
Use discard portions in muffins, waffles, or even chocolate cake for subtle tang and improved texture. Sourdough focaccia makes an elegant dinner bread, while sourdough bagels provide chewy satisfaction for breakfast.
For special occasions, incorporate herbs, seeds, or dried fruits into your bread recipes. The starter’s flexibility allows for creative experimentation while maintaining consistent results.
Common Mistakes to Avoid
Using Chlorinated Water
Chlorine kills beneficial bacteria and wild yeast. Always use filtered water or let tap water sit overnight to dechlorinate before feeding your starter.
Inconsistent Feeding Schedule
Irregular feeding creates weak, unreliable starter performance. Establish a routine and stick to it, adjusting only for temperature variations or vacation care.
Wrong Container Materials
Metal containers can react with acidic starter, affecting flavor and potentially harming the culture. Stick with glass, food-grade plastic, or ceramic containers.
Ignoring Temperature Effects
Extreme temperatures kill starter cultures. Keep your starter between 70-80°F for optimal activity. Avoid placing near heat sources or in drafty areas.
Not Discarding Before Feeding
Failing to discard portions leads to overgrown, sluggish starters with poor flavor development. Always remove half before adding fresh flour and water.
Storing Tips for the Recipe
Short-term Storage (Daily Use):
Keep active starters at room temperature, feeding daily with equal parts flour and water. Cover loosely to allow gas escape while preventing contamination.
Long-term Storage (Weekly Use):
Refrigerate mature starters in airtight containers, feeding weekly. Cold temperatures slow fermentation dramatically, requiring less maintenance while preserving culture viability.
Extended Storage (Monthly or Longer):
Dry a portion of active starter on parchment paper until crisp, then store in airtight containers at room temperature. Rehydrate with equal parts flour and water when ready to resume baking.
Vacation Care:
Increase flour ratio before refrigerating for extended periods, or ask friends to maintain feeding schedules. Healthy starters survive weeks of neglect but recover faster with consistent care.
Conclusion
Creating your own sourdough starter connects you to generations of bakers while providing endless culinary possibilities. This living culture becomes a rewarding part of your kitchen routine, offering both creative outlet and delicious results. The patience required during initial development pays dividends in flavor complexity and baking satisfaction.
Your homemade sourdough starter represents more than just a leavening agent – it’s a testament to the power of simple ingredients and time-honored techniques. Start your sourdough journey today and discover the joy of nurturing this ancient culinary tradition in your own kitchen.
FAQs
Can I speed up the sourdough starter development process?
While you can’t rush wild yeast cultivation, maintaining consistent warmth (75-80°F) and using whole grain flour for initial feedings can encourage faster activity. Patience ultimately produces the best results.
What should I do if my starter develops mold?
Discard any starter showing fuzzy growth or unusual colors immediately. Prevent mold by maintaining clean equipment, proper ratios, and consistent feeding schedules. Healthy starters have pleasant, tangy aromas without off-putting smells.
Can I use my sourdough starter straight from the refrigerator?
Cold starter works for some recipes but performs best when brought to room temperature and fed until active. Plan ahead by refreshing refrigerated starter 12-24 hours before baking.
How do I know if my starter is strong enough for bread making?
Perform the float test: drop a spoonful of recently fed starter into water. Floating indicates sufficient gas production for leavening. Additionally, your starter should double in size predictably after feeding.
What’s the best flour-to-water ratio for feeding?
Equal parts flour and water by weight (or volume) work well for most situations. Adjust ratios based on your starter’s consistency preferences – slightly thicker starters often show more dramatic rise and fall cycles.
Can I share my sourdough starter with friends?
Absolutely! Sharing starter spreads the joy of sourdough baking. Provide recipients with feeding instructions and basic care guidelines. Dried starter makes excellent gifts for long-distance sharing.

Sourdough Starter Recipe
- Total Time: Days 5-7
- Yield: serves 6
Description
The tangy aroma of fresh sourdough bread rising in your kitchen creates a connection to thousands of years of baking tradition. Creating a sourdough starter might seem mysterious, but it’s actually one of the most rewarding projects you can embark on in your culinary journey. This living culture of wild yeast and beneficial bacteria transforms simple flour and water into a bubbling, aromatic powerhouse that will elevate your bread-baking adventures.
Ingredients
Basic Starter Ingredients:
- 4 cups all-purpose flour (unbleached works best for wild yeast cultivation)
- 4 cups room temperature water (filtered or dechlorinated to avoid inhibiting yeast growth)
Alternative Flour Options:
- Whole wheat flour – Creates a more robust, earthy starter with faster fermentation
- Rye flour – Develops intense flavor and attracts wild yeast effectively
- Bread flour – Higher protein content creates stronger starter activity
Equipment Needed:
- Large glass jar or plastic container (avoid metal which can react with acids)
- Clean kitchen towel or coffee filter
- Rubber band or string
- Wooden or plastic spoon for stirring
The beauty of sourdough starter lies in its minimalist ingredient list. Choose organic, unbleached flour when possible, as it contains more wild yeast and nutrients. Your water quality matters too – chlorinated tap water can inhibit yeast growth, so let it sit overnight to dechlorinate or use filtered water.
Instructions
In your clean jar, combine 1/2 cup flour with 1/2 cup room temperature water. Stir thoroughly with a clean spoon until no dry flour remains visible. The mixture should resemble thick pancake batter with a smooth, uniform consistency. Cover loosely with a kitchen towel secured with a rubber band, allowing air circulation while preventing dust and insects from entering.
Place your starter in a warm, draft-free location like the top of your refrigerator or inside an oven with just the light on. Consistency in location helps maintain steady temperatures for optimal yeast development.
Starting on day two, establish your feeding schedule. Discard half of your existing starter (this prevents overgrowth and maintains proper ratios). Add 1/2 cup fresh flour and 1/2 cup room temperature water, stirring until well combined. The discarding process might feel wasteful initially, but it’s essential for maintaining a healthy, active culture.
Look for small bubbles forming within 12-24 hours, indicating wild yeast activity. The mixture may develop a slightly alcoholic or vinegary smell – this is completely normal and shows fermentation is occurring.
Days three and four typically bring increased activity. Your starter should begin doubling in size within 4-8 hours after feeding, creating a dome-like surface covered in bubbles. The aroma evolves from yeasty to pleasantly tangy. If you notice liquid forming on top, simply stir it back in – this “hooch” indicates your starter is hungry and ready for feeding.
Temperature fluctuations affect activity levels. Cooler conditions slow fermentation while warmth accelerates it. Adjust feeding frequency based on your starter’s behavior rather than strict schedules.
By days five through seven, your sourdough starter should pass the “float test.” Drop a spoonful of freshly fed starter into a glass of water – if it floats, the starter contains enough gas production for bread making. A mature starter doubles in size predictably and maintains a pleasant, tangy aroma without any off-putting smells.
Consistency in timing becomes crucial now. Your starter should peak (reach maximum height) at regular intervals, typically 4-12 hours after feeding depending on temperature and flour type.
Once established, your starter can live indefinitely with proper care. For daily baking, continue the feeding routine at room temperature. For weekly baking, refrigerate your starter and feed it once weekly. The cold environment slows fermentation dramatically, reducing maintenance while preserving the culture.
Before using refrigerated starter, bring it to room temperature and feed it. Wait until it shows signs of activity before incorporating it into recipes.
Nutrition
- Calories: 120
- Fat: 0.5g
- Carbohydrates: 25g
- Fiber: 2g
- Protein: 4g