
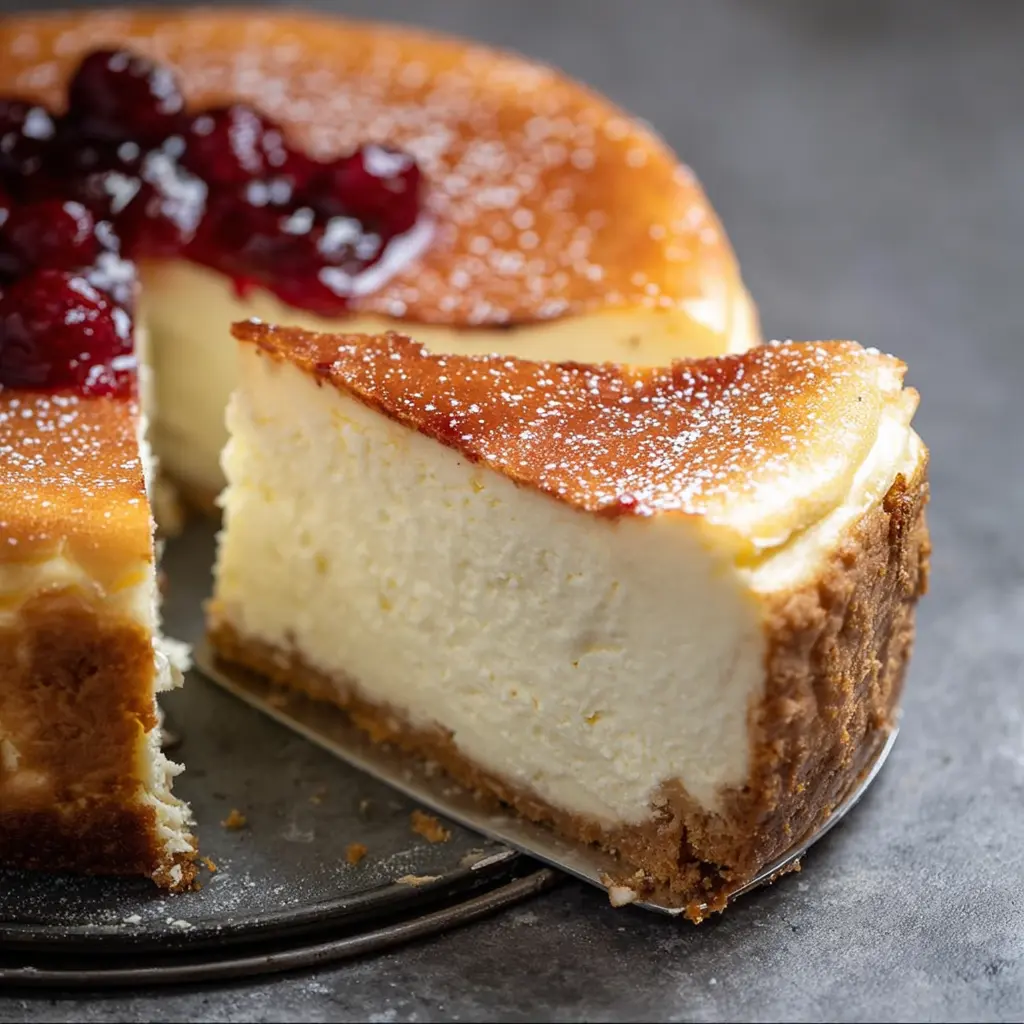
Nothing quite compares to that first forkful of silky, cloud-like cheesecake that melts on your tongue. I discovered this particular recipe during a late-night craving session, and it’s become my absolute go-to whenever I want to create something truly special. The Best Creamy Cheesecake Recipe transforms simple ingredients into pure indulgence, delivering that perfect balance of rich tanginess and velvety smoothness that makes cheesecake lovers weak in the knees.
What sets this recipe apart is its foolproof technique for achieving that coveted creamy texture without cracks or grainy consistency. The secret lies in the gentle baking method and perfect ingredient ratios that create a dessert worthy of any celebration – or Tuesday night treat.
Ingredients
For the Crust:
- 1½ cups graham cracker crumbs (about 12 crackers)
- ⅓ cup granulated sugar
- 6 tablespoons melted butter
- Pinch of salt
For the Filling:
- 32 oz (4 packages) cream cheese, room temperature
- 1 cup granulated sugar
- 1 cup sour cream, room temperature
- 4 large eggs, room temperature
- 2 teaspoons pure vanilla extract
- 2 tablespoons all-purpose flour
- ¼ teaspoon salt
Substitution Options:
- Gluten-free: Use gluten-free graham crackers or almond flour crust
- Lower fat: Substitute half the cream cheese with Greek yogurt
- Dairy-free: Use vegan cream cheese and coconut cream
- Sugar alternatives: Replace sugar with equivalent amounts of maple syrup or stevia
Timing
Preparation Time: 25 minutes
Baking Time: 60 minutes
Cooling Time: 4-6 hours (including refrigeration)
Total Time: 5-7 hours
Time Management Tips: Start this cheesecake the day before serving for best results. The extended chilling time allows flavors to develop fully. While the cheesecake bakes, use that hour to prepare toppings or clean up your kitchen.
How to Make It
1. Prepare Your Pan and Oven
Preheat your oven to 325°F (163°C). Wrap the outside of a 9-inch springform pan with aluminum foil to prevent water from seeping in during the water bath. This step is crucial for achieving that perfectly smooth texture without cracks.
2. Create the Perfect Crust
Mix graham cracker crumbs, sugar, melted butter, and salt until the mixture resembles wet sand. Press firmly into the bottom of your prepared pan, creating an even layer. Bake for 10 minutes until lightly golden. The aroma of toasted graham crackers signals it’s ready.
3. Blend the Silky Filling
In a large bowl, beat cream cheese until completely smooth and fluffy – about 3-4 minutes. Gradually add sugar, beating until well combined. Mix in sour cream, then add eggs one at a time, beating just until incorporated. Overmixing can create bubbles that lead to cracks.
4. Add Final Touches
Gently fold in vanilla extract, flour, and salt. The batter should be smooth and pourable, with no lumps of cream cheese visible. Pour over the prepared crust, smoothing the top with an offset spatula.
5. Master the Water Bath
Place the springform pan inside a larger roasting pan. Carefully pour hot water into the roasting pan until it reaches halfway up the sides of the springform pan. This gentle, humid heat prevents cracking and ensures even cooking.
6. Bake to Perfection
Bake for 55-60 minutes until the center is almost set but still slightly jiggly. The edges should look set, but the center should wobble slightly when gently shaken. Turn off the oven and crack the door open, letting the cheesecake cool gradually for one hour.
7. Complete the Cooling Process
Remove from water bath and cool completely at room temperature, then refrigerate for at least 4 hours or overnight. This patience pays off with the creamiest possible texture.
Nutritional Information
Per serving (12 servings):
- Calories: Approximately 380
- Protein: 8g
- Carbohydrates: 28g
- Fat: 28g
- Calcium: Good source from dairy ingredients
- Vitamin A: Present from dairy and eggs
This indulgent dessert provides protein and calcium while delivering rich, satisfying flavors. The eggs contribute essential amino acids, while the dairy ingredients offer bone-supporting nutrients.
Healthier Alternatives for the Recipe
Lighter Version: Replace half the cream cheese with Greek yogurt and reduce sugar by ¼ cup. This cuts calories while maintaining creaminess.
Protein-Packed: Add 2 scoops of vanilla protein powder to boost protein content, adjusting liquid as needed.
Natural Sweeteners: Substitute sugar with pure maple syrup or honey, reducing the amount by about ¼ since liquid sweeteners are more concentrated.
Portion Control: Make mini cheesecakes in muffin tins for built-in portion management – perfect for parties and meal prep.
Serving Suggestions
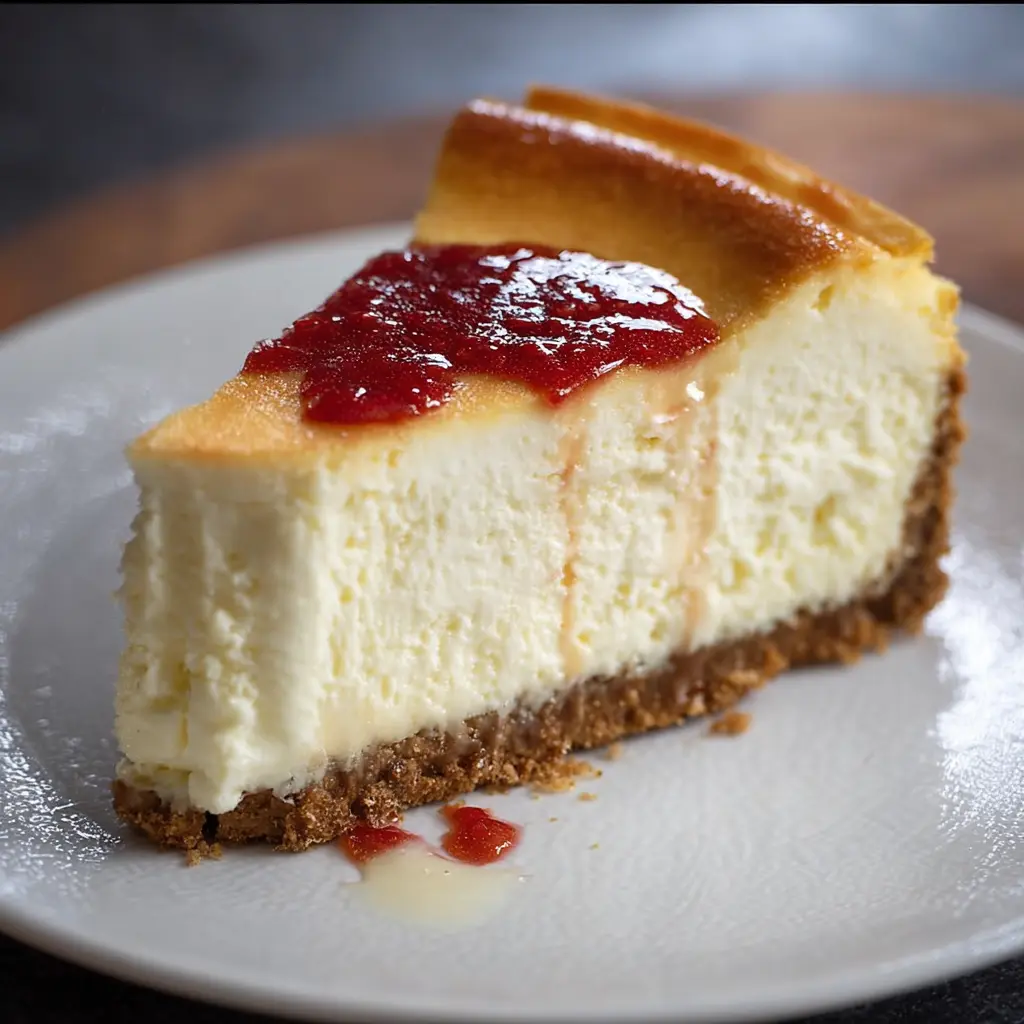
Serve chilled slices with fresh berry compote, a drizzle of chocolate ganache, or a simple dusting of powdered sugar. Pair with strong coffee or dessert wine to balance the richness.
For special occasions, garnish with candied citrus peel, toasted nuts, or seasonal fruit. A small portion goes a long way – this rich dessert satisfies with just a moderate slice.
Common Mistakes to Avoid
Using Cold Ingredients: Room temperature ingredients blend more easily, preventing lumps and ensuring smoothness.
Overmixing: Beat just until combined to avoid incorporating excess air, which can cause cracking.
Skipping the Water Bath: This crucial step provides gentle, even heat that prevents cracking and ensures creamy texture.
Opening the Oven Door: Sudden temperature changes cause cracks. Trust the process and resist peeking.
Rushing the Cooling: Gradual temperature changes prevent the dreaded crack down the center.
Storing Tips for the Recipe
Refrigerator Storage: Cover tightly and refrigerate for up to 5 days. The flavors actually improve after the first day.
Freezer Storage: Wrap individual slices in plastic wrap, then foil. Freeze up to 2 months. Thaw overnight in the refrigerator before serving.
Make-Ahead Tips: Prepare completely up to 3 days ahead. Add toppings just before serving to maintain their fresh appearance and texture.
Transport Tips: Keep chilled until ready to serve. Use a cake carrier or large container to protect the delicate surface.
Conclusion
This Best Creamy Cheesecake Recipe delivers bakery-quality results in your own kitchen. The combination of proper technique, quality ingredients, and patience creates a dessert that’s both impressive and deeply satisfying. Whether you’re celebrating a special occasion or simply treating yourself, this cheesecake never disappoints.
The beauty of this recipe lies in its reliability – follow these steps, and you’ll achieve that perfect creamy texture every time. Don’t be surprised when friends and family start requesting this as their birthday cake!
FAQs
Q: Why did my cheesecake crack?
A: Cracks typically result from rapid temperature changes, overmixing, or skipping the water bath. Ensure gradual cooling and gentle mixing for best results.
Q: Can I make this without a springform pan?
A: While possible, springform pans make removal much easier. If using a regular cake pan, line with parchment paper with overhang for easier lifting.
Q: How do I know when it’s done baking?
A: The center should be almost set but still slightly jiggly. It will continue cooking as it cools. Overbaking creates a dense, rubbery texture.
Q: Can I add flavors to this base recipe?
A: Absolutely! Add lemon zest, cocoa powder, or fruit purees. Replace ½ cup of the base with your flavoring ingredient for best results.
Q: Why is my cheesecake grainy?
A: Grainy texture usually indicates cold cream cheese or overmixing. Ensure all ingredients are at room temperature and mix just until smooth.
Q: How far ahead can I make this?
A: This cheesecake actually improves with time. Make it 1-3 days ahead for optimal flavor development and convenience.

The Best Creamy Cheesecake Recipe
- Total Time: 1 hour
- Yield: 12 servings 1x
Description
Nothing quite compares to that first forkful of silky, cloud-like cheesecake that melts on your tongue. I discovered this particular recipe during a late-night craving session, and it’s become my absolute go-to whenever I want to create something truly special. The Best Creamy Cheesecake Recipe transforms simple ingredients into pure indulgence, delivering that perfect balance of rich tanginess and velvety smoothness that makes cheesecake lovers weak in the knees.
Ingredients
For the Crust:
- 1½ cups graham cracker crumbs (about 12 crackers)
- ⅓ cup granulated sugar
- 6 tablespoons melted butter
- Pinch of salt
For the Filling:
- 32 oz (4 packages) cream cheese, room temperature
- 1 cup granulated sugar
- 1 cup sour cream, room temperature
- 4 large eggs, room temperature
- 2 teaspoons pure vanilla extract
- 2 tablespoons all-purpose flour
- ¼ teaspoon salt
Substitution Options:
- Gluten-free: Use gluten-free graham crackers or almond flour crust
- Lower fat: Substitute half the cream cheese with Greek yogurt
- Dairy-free: Use vegan cream cheese and coconut cream
- Sugar alternatives: Replace sugar with equivalent amounts of maple syrup or stevia
Instructions
Preheat your oven to 325°F (163°C). Wrap the outside of a 9-inch springform pan with aluminum foil to prevent water from seeping in during the water bath. This step is crucial for achieving that perfectly smooth texture without cracks.
Mix graham cracker crumbs, sugar, melted butter, and salt until the mixture resembles wet sand. Press firmly into the bottom of your prepared pan, creating an even layer. Bake for 10 minutes until lightly golden. The aroma of toasted graham crackers signals it’s ready.
In a large bowl, beat cream cheese until completely smooth and fluffy – about 3-4 minutes. Gradually add sugar, beating until well combined. Mix in sour cream, then add eggs one at a time, beating just until incorporated. Overmixing can create bubbles that lead to cracks.
Gently fold in vanilla extract, flour, and salt. The batter should be smooth and pourable, with no lumps of cream cheese visible. Pour over the prepared crust, smoothing the top with an offset spatula.
Place the springform pan inside a larger roasting pan. Carefully pour hot water into the roasting pan until it reaches halfway up the sides of the springform pan. This gentle, humid heat prevents cracking and ensures even cooking.
Bake for 55-60 minutes until the center is almost set but still slightly jiggly. The edges should look set, but the center should wobble slightly when gently shaken. Turn off the oven and crack the door open, letting the cheesecake cool gradually for one hour.
Remove from water bath and cool completely at room temperature, then refrigerate for at least 4 hours or overnight. This patience pays off with the creamiest possible texture.
- Cook Time: 60 minutes
Nutrition
- Calories: 380
- Fat: 28g
- Carbohydrates: 28g
- Protein: 8g